Authorization View Profiles (AVP)
Mastro’s Authorization View Profiles allow you to define data access policies, by telling the system which ontology entities can be queried by which user groups. Basically, you are creating a view of the ontology (or a subset of its entities): each chosen entity will return data if queried, and each excluded one will not (so a SPARQL query which involves an excluded entity will not return any result).
This is particularly helpful in large enterprise settings, where different users, possibly from different departments or business units, may have limited access to the data underlying the ontology, according to their sector or privileges. Rather than creating an ontology and mappings for each of these different user groups, you can simply create different views over the same ontology and mappings, and Mastro will take care of the rest.
Creating an AVP
Click on the AVP menu item in the Ontology Menu, and you will land on the AVP page.
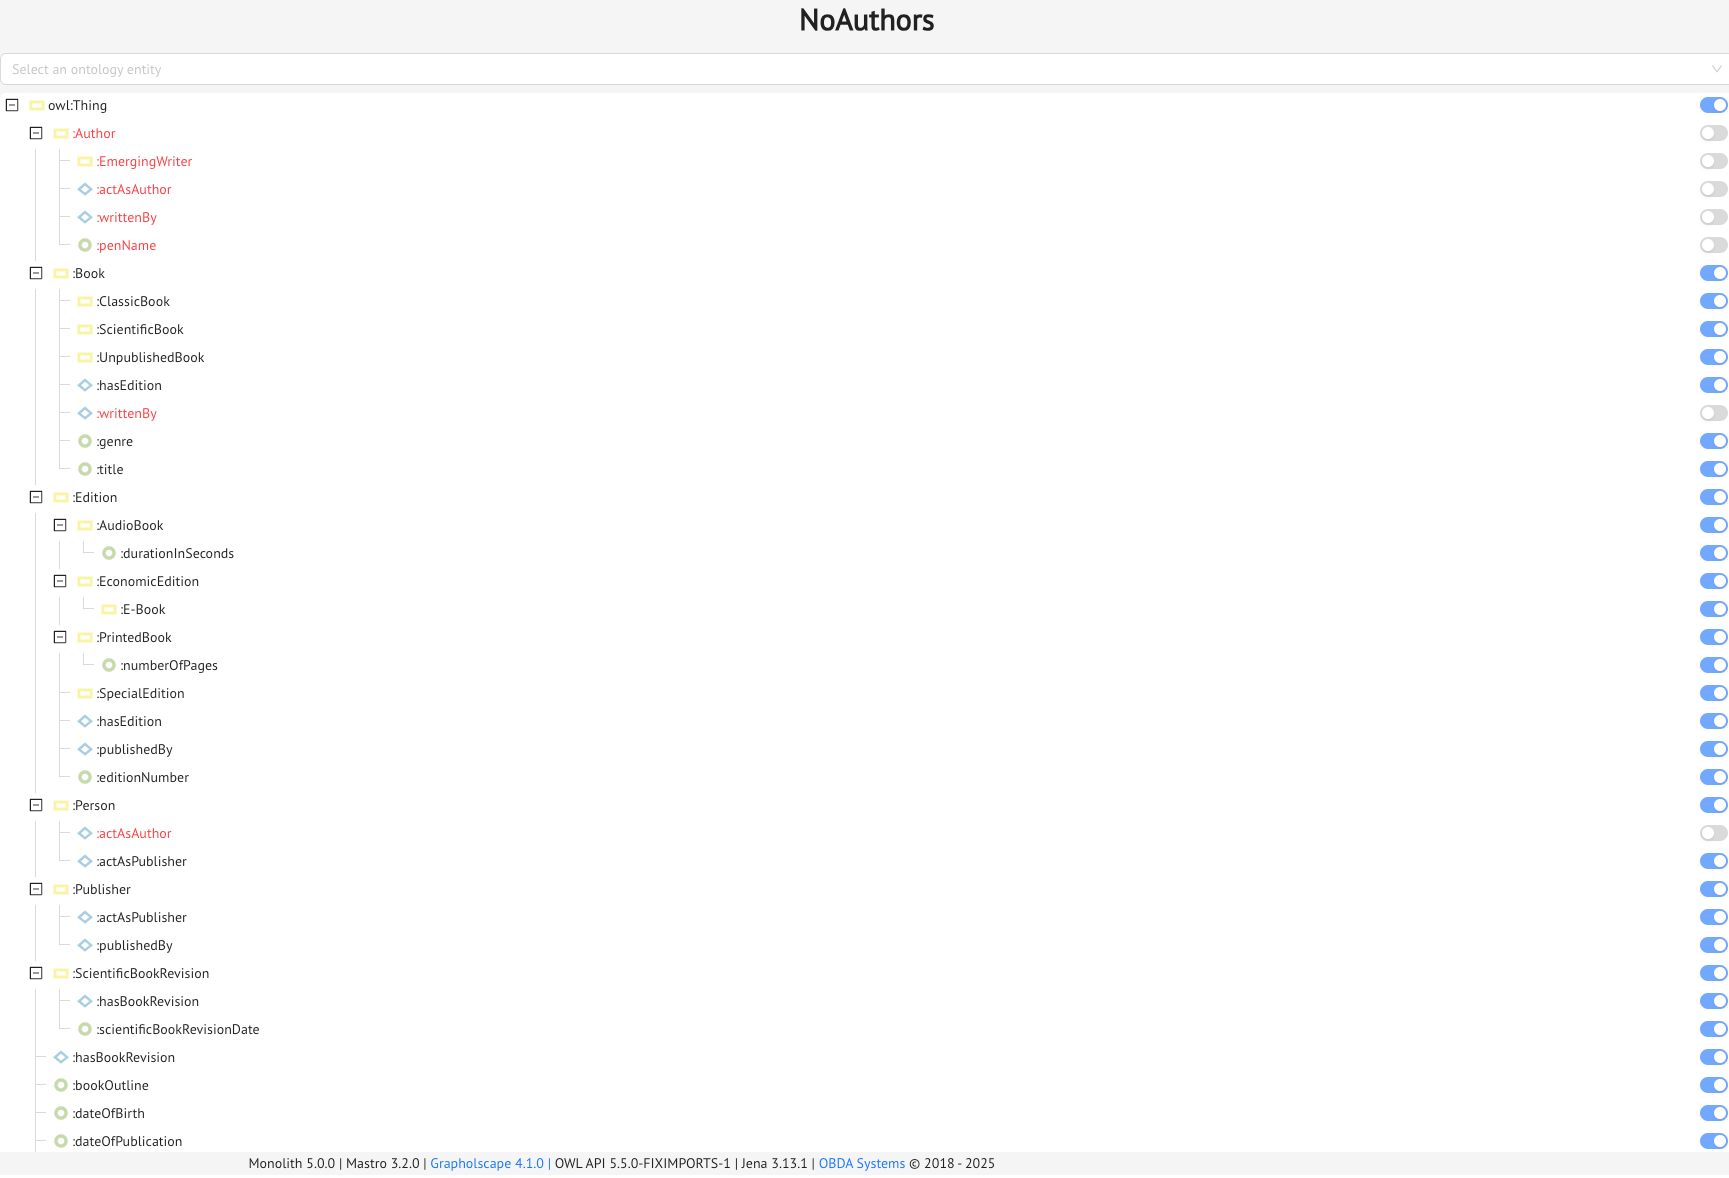
From here, click on the Create an Authorization View Profile button, and the AVP drawer will slide out. From here, simple provide a Name for the AVP, the usual optional description, and choose, from the hierarchy list in the Permissions tree, the entities you want to include (or exclude) from the view by torning the toggle buttons on or off.
Remember: if the toggle button is showing yellow, the entity is in the view, and you can use it in your SPARQL queries to get results; if it’s showing gray, the entity is not in the view, so your SPARQL queries with that eneity won’t return results (in other words, you can’t query the entity).
Try turning some of the entities on or off through the toggle buttons. You’ll see that turning something on/off may cause other entities, typically their children in the entity tree to be turned on/off.
For example, turn
:Editionoff.:EconomicEdition,:SpecialEdition, and so on will also be turned off. This is because we want to be sure that your AVP are safe, meaning that we don’t want to accidentally provide data for entities outside the AVP when running the SPARQL queries. So if you don’t want to show instances of the class:Editionto some user groups, you also don’t want them to query the:EconomicEditionor:SpecialEditionentities, since instances of these classes are also instances of the:Editionclass.
Basically, the selections in the Permissions tree are mimicking Mastro’s ontology reasoning!
Once you are satisfied with your selections, click on the Save button. The AVP will be added to the AVP Catalog on the left, and you will be shown a recap of the choices you made (entities turned off are shown in red).
From the AVP Catalog you can edit or delete an AVP at any time.
Using an AVP
Now that you have created an AVP, you want to use it to define your data access policies.
This means creating a Mastro Endpoint on the AVP you have just created. So, go the Mastro Endpoint page, and follow the usual steps to create an Endpoint, but also choose an Authorization View Profile from the drop-down list.
That’s it, you’re done! Everything also is managed in the User Administration page under the Roles and Permissions tab, so we’ll get to that later.
Previous Next