No-code Queries
Monolith exploit a no code SPARQL Query Builder providing two main approaches:
- the user can explore and select entities in the underlying ontology while building the query
- rely only on suggested paths in the ontology (obtained by the ontology reasoner Mastro)
If you want to see the ontology graph you need to select the ontology rendering modes among the available ones (see Ontology Explorer)
The Query Catalog
On the left hand side you can the see the Query Catalog where all the saved queries will be available (if accessible to the user). This management of this part is very similar to the SPARQL Query Catalog
Building a Graphical Query
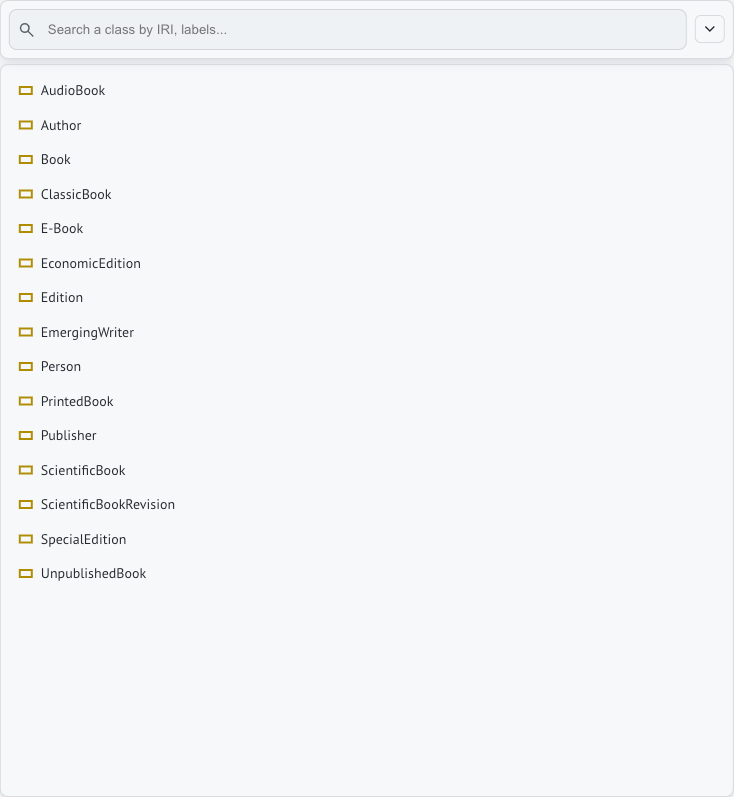
The general approach of the tool is to exploit the ontology classes of the ontology and let the user interact with them in order to build a SPARQL query. In fact to start building a query the user must select the class of interest from the classes of the ontology. This is achieved by selecting a node in the underlaying ontology graph available or selecting the class from the initial list.
In order to build the query generator provides additional components over the traditional explorer widgets:
Query Graph
The Query Graph wants to represent the pattern of the query as a graph. If you enable the ontology graph the query graph is displayed in the bottom widget otherwise it is viewed in fullscreen. Each node of the graph is a variable created from a certain ontology class, for example selecting the class :Book the resulting SPARQL query will be:
PREFIX  :     <http://www.obdasystems.com/books/>
PREFIX  rdf:  <http://www.w3.org/1999/02/22-rdf-syntax-ns#>
SELECT DISTINCT  *
WHERE
  { ?Book  rdf:type  :Book }
From the Query Graph Menu you can respectively (from left to right):

- Force or not the query to have Distinct results (no duplicates)
- Count Results instead of returning all the rows of the answer
- Reset the query to the initial empty state
- Inspect the SPARQL code of the query
- Center the query graph to fit the screen size
- Limit the number of results to a specific number
- Set an Offset from which the results are returned
- Export the query graph as an image (.png or .svg)
You can also interact with the nodes and edges of the query graph itself.
- By left-clicking a node of the graph (a class) your are selecting the class and the suggestions will change accordingly to the selected class.
- By right-clicking you can access to the context menu
- By dragging a node over another node you can join the two nodes together (they should have a common class)
Context Menu
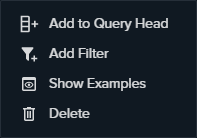
The Context Menu provides different actions depending if you are left-clickng an ontology class, object-property or data-property.
- Add to Query Head: select the class or data-property as an interesting output adding it to the Query Columns Widget; it will be returned as an answer
- Add Filter: filter the class or data-property using the Filter Modal. You can distinguish the filtered nodes by the presence of a funnel
- Make Optional: set the data-property as not mandatory, rows without that attributes will not be filtered. If you select it on a object-property all the nodes on the right of the object-property will be considered Optional. You can distinguish the elements of the graph set as Optional because the lines are dashed
- Show Example: it issues a simple query asking for example values for a certain class or data-property
- Delete: deletes the node and all the nodes and edges on the right. If there is a Query Column associated it will be removed.
You may have noticed that some actions (Delete and Optional) cause the effect on other nodes. This happens beacause we do not want queries to be meaningless such as a cartesian product or similar. Hence the query graph will never have nodes disconnected to the rest of the query graph (you can consider the Optional as a sub graph).
Query Columns
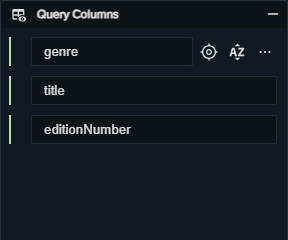
This widget manages how the results will look like: the columns of the table of the results. When the user adds a data_property to the Query Graph, it is automatically added to the Query Head as well. In order to add a class to the Query Head you should use the Context Menu (IRI will be returned in output).
For each row in the Query Columns you can (commands visible on mouse over):
- Reorder the items through the handle on the left
- Find in the graph the node (class or data-property) which correspond to the column
- Sort the results in alphanumerical order (ascending, descending, none)
- Add a Filter to the node equivalent of Context Menu using the Filter Modal
- Add a Function: depending on the type defined in the ontology you can manage special functions.
- For strings:
UCASE(upper case),LCASE(lower case),CONTAINS,CONCAT(concatenation of strings),STRLEN(length of strings),STRSTARTS, STRENDS, STRBEFORE, STRAFTER - For numbers:
ADD, SUBCTRACT, MULTIPLY, DIVIDE, ROUND, CEIL, FLOOR - For date times:
YEAR, MONTH, DAY, HOURS, MINUTES, SECONDS
- For strings:
- Add Aggregation Function: groups the results rows which have the same columns and aggregate this column using one of the following functions:
count, sum, min, max, average- The user can optionally to use the function only on Distinct values
- The user can optionally add a Having clause which is indeed a Filter on the Aggregation Function (see Filter Modal for further informations)
- Delete the column from the Query Columns (the node will NOT be removed from the Query Graph)
Suggestions
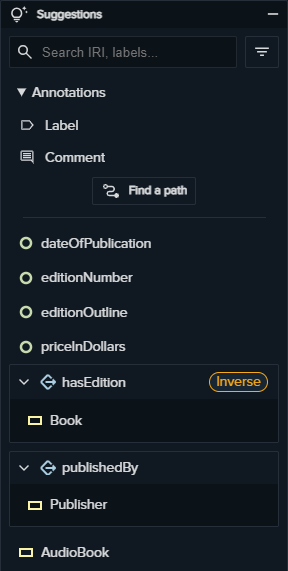
In this widget the user exploit the capabilities of the Mastro Reasoner, here is where the magic happens! It processes the ontology and find new links among the ontology entities (classes, object-properties and data-properties) and show them in the widget.
So, when a class is selected from the Query Graph, the Mastro Reasoner finds all the possible related entities. The user can click on one of the suggestions to add them to the Query Graph. The suggestions are divided in four categories:
- The annotations (
rdfs:labelandrdfs:comment) which describe the object of a class by means of a name and a description - The data-properties related to the selected class
- The object-properties related to the selected class: in this case you need to click once to expand the property and a second time to select the “arriving class” which will be added to the Query Graph. Notice: the tag
inversedenotes that the object-property is navigated from the range to the domain (e.g. backwards) - The classes related to the selected class: they could be children or siblings (non-disjoint) of the selected class. Selecting them acts like a special filter, and you will see that in the Query Graph a compound node will appear containing the two selected classes
You may expirience some suggestion to be disabled, that’s because the mappings used by the selected endpoint could not cover some entities. Since you probably are not interested in empty queries (by definition), the tool inhibits the creation of such queries.
Shortest Path
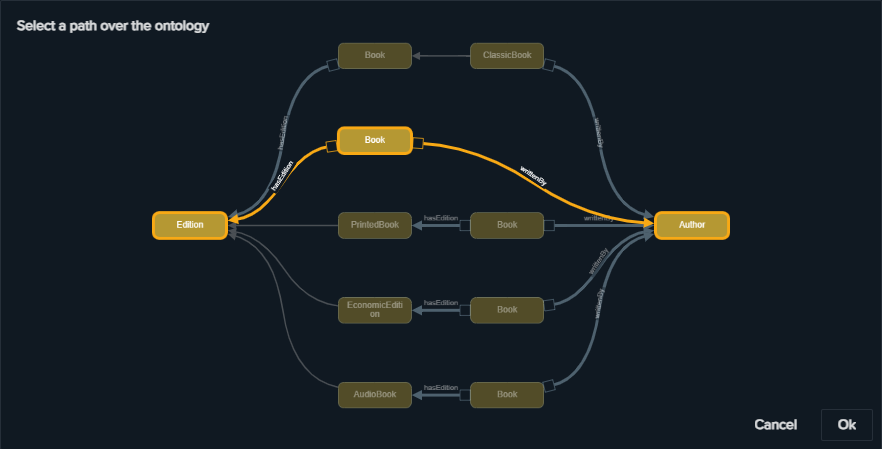
You can use this functionality if you want to speed up the composition of your queries. It exploits the connections of the ontology to find connections between two classes. As a navigation system, it suggests five connections between the selected classes passing through a small number of object-properties (connections may exists as declared or “reasoned”). Once the user chooses a path, it is automatically added to the Query Graph and it is ready to be executed or modified using the described widgets.
Filter Modal
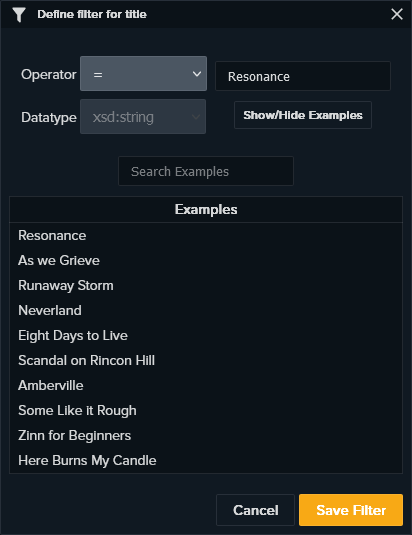
This modal is used to filter the rows of the results according to an operation anda value. The possible operations are the following:
=, !=, <, >, <=, >=, IN, NOT IN, REGEX, ISBLANK, NOT ISBLANK
The user can also find examples (and search them)in order to find suitable values for the filtering operation. The resulting examples are clickable and the value is automatically compiled.
Query Settings

In the above widget there are the main functionalities of the query, which are:
- The name of the query:
new_queryis the default name,*denotes that the query has not been saved yet. To change the name save the query by means of the save button. - Toggle Query Catalog to hide/show the Query Catalog
- Save to save all the settings of the query
- Metadata to change query metadata: description and query tags
- Mastro Endpoint to select against which Mastro Endpoint the query should be executed
- Run to execute the query
- View in VKG to execute the query as a CONSTRUCT (same BGP as WHERE clause) and view the results in the VKG page
- Stored Results to see (if available) the current results
- Ontology Graph to see (or not) the underlaying ontology while building the query
Complete Example
For example the following query:
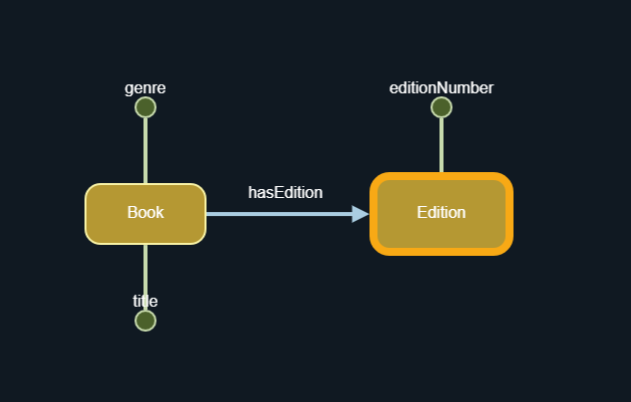
With the query head:
It is equivalent to the SPARQL query:
PREFIX  :     <http://www.obdasystems.com/books/>
PREFIX  rdf:  <http://www.w3.org/1999/02/22-rdf-syntax-ns#>
SELECT DISTINCT  ?genre ?title ?editionNumber
WHERE
  { ?Book     rdf:type        :Book ;
              :hasEdition     ?Edition .
    ?Edition  rdf:type        :Edition .
    ?Book     :genre          ?genre ;
              :title          ?title .
    ?Edition  :editionNumber  ?editionNumber
  }
Previous Next